Following both my AT and CT thru-hikes, I decided I not only wanted digital images...but that I wanted an actual, tangible photo album. I know, it's a little old school, but there something about having a physical album to flip open and go through. The downside of course is this can get expensive. For both the AT and CT hikes, I simply brought my photos up to the local "big-box"store, used a Kodak digital-photo center, and waited as my photos (over 400 for the AT) printed out. Add in the cost of some nice albums and making these albums cost me over $100.00 for each (The CT was a bit cheaper). The problem I found was that the printed photos never looked as nice as the digital copies. Obviously, I was printing raw images at a Kodak kiosk...and knew they wouldn't be spectacular.
So....moving to the present, I have been reluctant to make a photo album for my PCT hike. I had almost gone through the process before heading to Antarctica, but then decided to wait.
While on the ice, I was messing around in iPhoto and noticed that Apple now has a "Create/Buy photo album option". You can basically design a photo album, and then upload that design with photos to an apple website...pay a fee...and they mail you an album. So this is what I did. And I decided to do it right.
Here's what I did:
- First, I went through all of my photos and decided what I wanted to include. There is a 100 page limit to iPhoto albums and I didn't wan't more than two albums.
- Second, I went through each photo, individually, and "enhanced them" in iPhoto. This doesn't necessarily mean I just pushed the "enhance" button. Sometimes, I adjusted the shading, sometimes the contrast, sometimes the exposure. This was a very time consuming process and took me several hours over several nights, but the resultant photos were exactly as I wanted them printed.
- Next, I picked a theme I liked and started importing all the photos into the albums. I knew I would have two books so I tried to split the pics in half.
- Next, and this was the most time consuming part, I went through each page and designed the layout. You can have several pics on a page, or just one. So I went through each photo and each page deciding which pictures I wanted to make larger (and which ones could be made smaller). Some that I chose were simply more beautiful, some represented a more vivid memory. This is where my personal thru-hike stories and experiences really came into play. I had to be careful not to blow up too many pictures as space was limited. I also decided to add some text on the front and back of the dust cover as well as on the first and last pages. I went through the quotes and blog postings that most clearly represented my thoughts on this hike and went with ones I thought fit best.
-Finally, I proof-read everything and submitted. It was expensive (about $100.00) so I was nervous. I decided to only buy the first book and keep the second one on standby in case the quality was terrible.
Overall I'm very pleased with the book. The quality itself is very high and the photos, while still not quite as good as their digital counterparts, are much nicer than from the Kodak kiosk.
Here's are some quick shots (some appear fuzzy in the blog due to quick snaps with my camera in low-light):
The book came in a classic Apple "sleeve". Almost looked like a new laptop
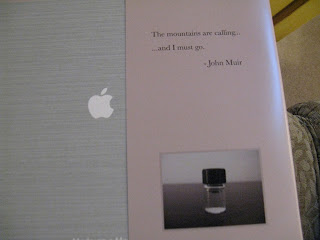
Inside-Front Dust Cover
Page 1
Layout: 3 pics, 2 talls and 1 wide
Layout: 3 pics, 1 tall and 2 wide
Layout: 3 pics: 3 wide
Same
Full page photo
Another 3 pic page: all wide
Full Page photo
Full page photo
Last page. This entry comes from a quote, courtesy of Jonathan Ley.
I edited a few of his notes and added a couple...but kept most of it intact
Inside-Back dust cover
Back Cover


2 comments:
Nice work, John! We did something similar through our travel blog website (mytb.org) for our round-the-world trip. The difference is that it had all the text of our blog along with all the pictures. We didn't have to do all the editing, because it basically printed the blog as-is. When it printed, there were some printing errors on some of the photo-captions. We paid $80 for it, so we wanted it to be perfect. We complained and they sent us a second copy with the same problem. We finally got a good copy and were able to give the slightly flawed copies to our parents.
Your album looks a lot more slick, and when you take the time to hike from Mexico to Canada, you have to make sure that the album is perfect. Can't wait to see the book in person!
Thanks for the post. I've been considering using the iPhoto-album program for a project but hadn't run across anyone else that has actually used it. It is nice to know it worked and looks good too!
Post a Comment